 Click on the Category button to get more articles regarding that product.
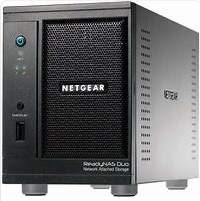
Ready NAS DUO V2 Failure
The manual of the Ready NAS Duo and the Ready NAS Duo V2 are awful. Here is how to complete factory reset the device. The manual “Raedynas DUO V2 and NV+ V2 Hardware Manual” is wrong and the information on page 25 “To access the boot menu” did not work for a ReadyNAS Duo V2 bought in Europe.
Just to make sure you understand:
You lose all DATA on the existing drivers. We are at the status where after trying several hours with existing documentation you can’t access anything and want it going running again.
-
We need to format a USB device with Firmware. You are able to identify your Local Drivers for the procedure. If you are unsure leave it or with the tool to format the USB key you destroy the pc and make even more trouble. Call Netgear if you are unsure.
Situation: You have special hardissk (self buyed) or existing hard disk swapped and mixed up and the RAIDAR shows: “corrupt root”.
Prelude:
If there are data on the disk, there is a LINUX OS with several partitions on it. If you insert an existing OLD disk while doing the steps mentioned below the Netgear will TRY to boot that environment setting. If that happens you end up in a loop or where you where before. To make sure there is absolute nothing left from other Netgear devices or old RAID Volumes hang the disk to a PC with and USB/SATA connector and clean everything. You will see several partitions on your disk. Just delete those. Use Windows XP/7 disk management for that or some Acronis/Hiren.


Finally put the TWO “cleaned” or new disk into the turned off NAS and start:
-
Power off The Netgear device
-
Push a paperclip in the “reset” hole at the back and hold it down
-
Push power button (Blue Button once short to turn it on)
-
After 5 seconds two green led’s will show (1 and 2 on front)
-
Push reset and power button TOGETHER and hold it down
-
After approx. 30 seconds two green led will show again
-
Let go of the reset and power button together
-
Wait until the Flashing blue front Power button turns of
-
Continue from here with normal setup using RAIDar


Situation 2: The Netgear is complete done and no matter what you try you are kind of stuck. You are used to NAS/SAN/Storage but this thin drives you crazy.
Your Netgear is blinking and doing, you tried all steps in every Google info you found, and it is still not working. You are on 192.168.168.168 and after some times or while inserting an existing disk you and up in losing the connection to the device or failure.
Reset the Firma of the Netgear NAS DUO V2.0
-
Search and download the tool “rw32-setup-1.0.2.3.exe” in Google (Rawrite32)
-
Search and download the Firmware File “ReadyNAS_USB_Flash_Recovery-4.1.8.img”
-
Search and download the Raidar tool if you don’t have it already. The tool does a broadcast scan and find is the Readynas whatever IP address it has.
-
Start with a USB Stick which is empty. Start the RAWrite32 which you installed.


-
Choose the .IMG File we mentioned or any newer one. As example “ReadyNAS_USB_Flash_Recovery-4.1.8.img”
-
Choose “All Files” so you see it


-
Now check where you existing USB drive is. Do not USE the options “Write to physical Devices”. Those are you local hard disk (Noob reminder 😉

 $
$
-
Check that you have selected your USB devive and not local disks


-
Once again! Check in Explorer again if you have chosen the CORRECT USB drive! Do not format your Windows or Data disk. Usage at own risk.


-
Performing USB recovery information
Before doing the USB boot on the ReadyNAS, remove any additional USB devices (UPS, Printers, etc.) that are connected to the ReadyNAS.
Connect the USB-stick drive to any USB port and hold down the power button for 20 seconds until after the hard drive lights blink the 4th time.
While you are holding down the power button, you will see the hard drive lights flash at 5 sec, 10 sec, 15 sec and finally at 20 seconds. After you let go of the power button the Netgear NAS will boot normal and fresh.