Click on the Category button to get more articles regarding that product.
McAfee Endpoint Security Platform for Linux and McAfee Endpoint Security for Linux Threat Prevention

Mcafee/Trellix is one of the security vendors which cover every client OS. I personal only work with Linux based on CENTOS Stream private or on the job with security appliances or MDM managment Servers.
I love Centos and it has allways worked for me. I run DNS Servers on it since years. Whenver allowded i used WEBMIN GUI because for us Windows people it just makes life easier a little bit.
This manual should help Microsoft Windows Engineers like myself to install an actual Version of Mcafee/Trellix ENS for Linux an a CENTOS 9 Release.
https://kcm.trellix.com/corporate/index?page=content&id=KB87073
Supported platforms for Endpoint Security for Linux Threat Prevention
You need the Mcafee Agent which is used to connect clients (Windows/Linux) to the Mcafee/Trellix EPO-Management Server EVEN when in standalone mode.
So you need to install three things in that order:
- Import the Public key MUSARUBRA_LLC.PUB [File: MUSARUBRA_LLC.tar]
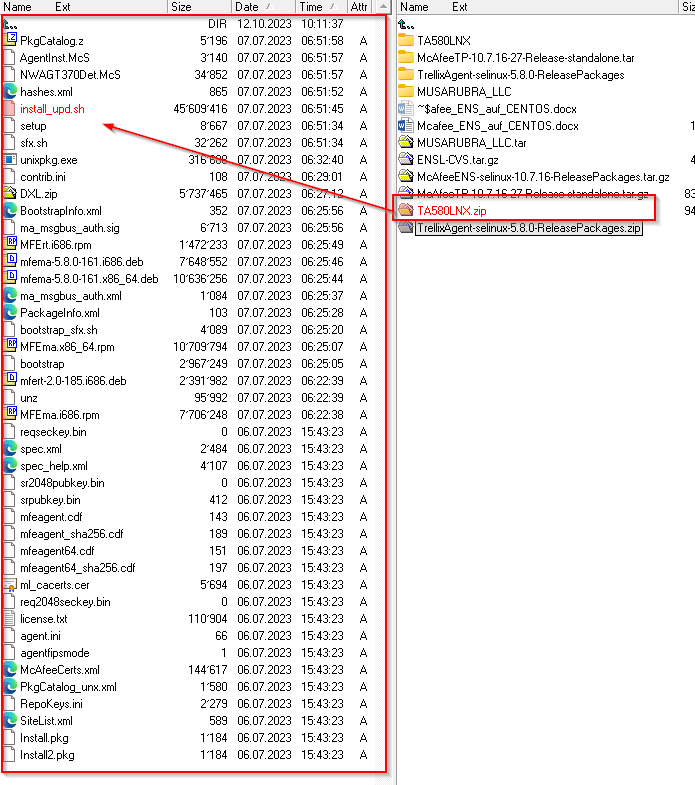
- Install Mcafee/Trellix Agent [File: TA580LNK.zip]
- Install Mcafee/Trellix ENS Endpoint Protection for Linux Standalone [File: McAfeeTP-10.7.16-27-Release-standalone.tar.gz]

Files used so you can identify them:
TA580LNK.zip = Trellix/Mcafee Agent
McAfeeTP-10.7.16-27-Release-standalone.tar.gz = Trellix Endpoint Security Threat Protection
MUSARUBRA_LLC.PUB from package MUSARUBRA_LLC.tar
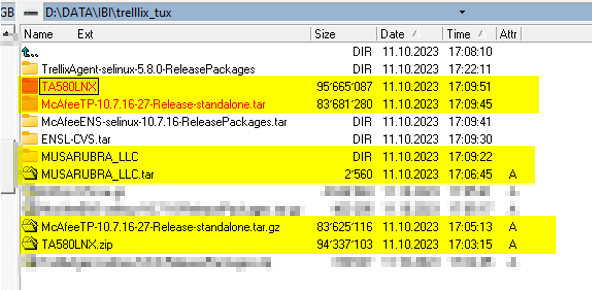
Trellix Agent 5.8 package unzipped:

Extract all the Files on Windows sie with 7ZIP or your fav packer tool.
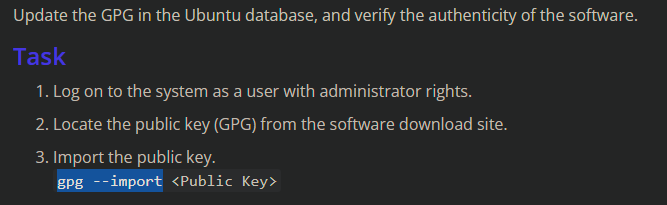
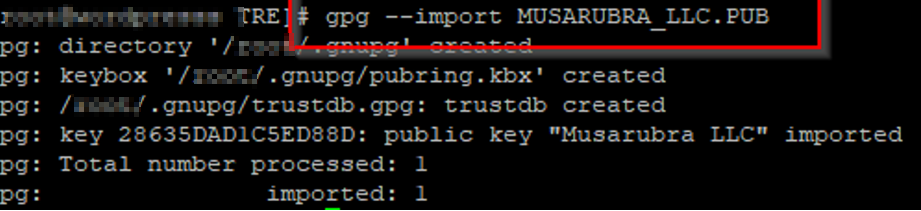
Import the Public key MUSARUBRA_LLC.PUB [File: MUSARUBRA_LLC.tar]
Extract and copy over the MUSARUBRA_LLC.PUB from package MUSARUBRA_LLC.tar (You extract on WIN side) to tux.
gpg –import MUSARUBRA_LLC.PUB
Install Mcafee/Trellix Agent [File: TA580LNK.zip]
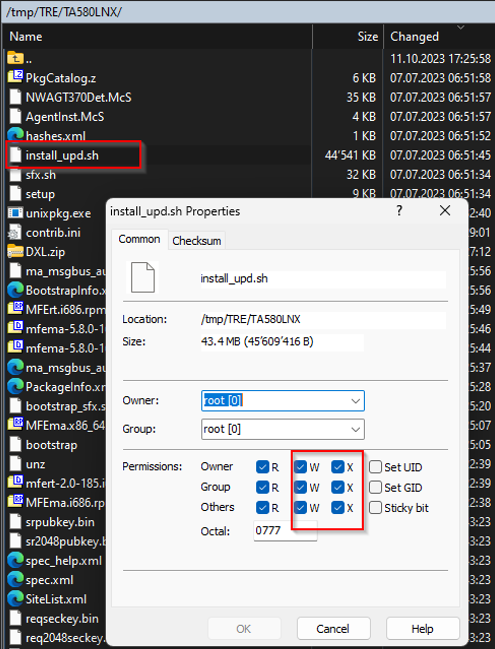
Copy the unpacked Agent files from TA580LNK.zip over to your Linux machine with WINSCP.
For TUX-noobs like us: To execute the Agent installation script you may have the change the CHMOD Permission with WINSCP if you can’t execute the file.
Option for the Agent to install
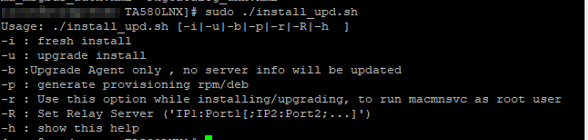
A fresh install of the Agent would be:
Sudo ./install_upd.sh –i
Then info hell breaks out as usual when you type a update or install command on Linux. But it all looks fine. 😉
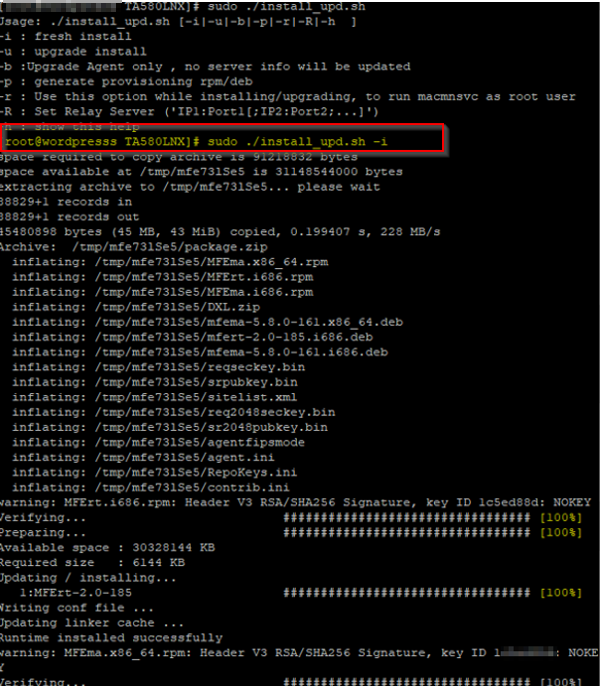
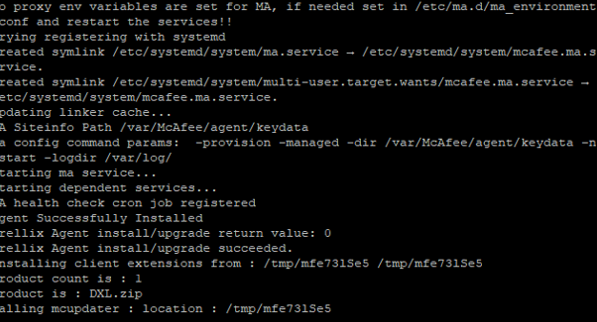
Somewhere in between you should see “Agent Successfully installed…..”
So the AGENT Framework (In Corporate we use that to control Clients [Windows or Linux] from the Managment Server EPO) is installed.
.
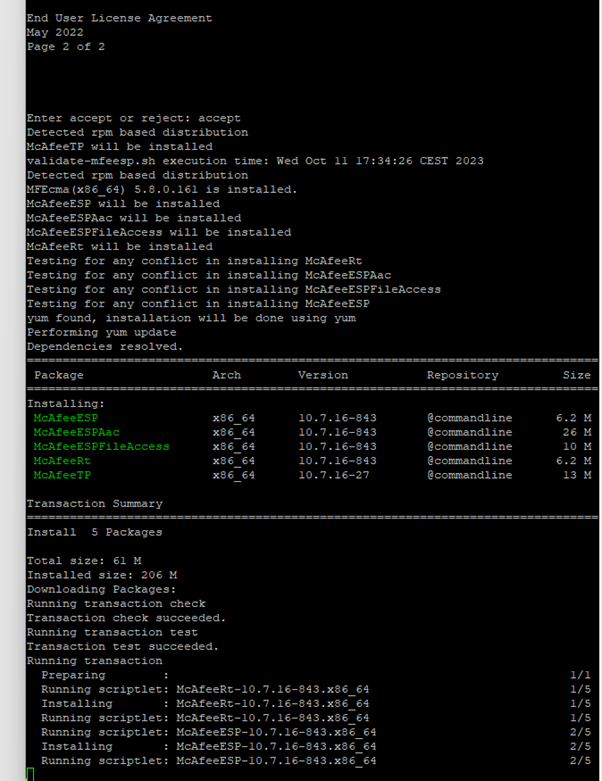
Install Mcafee/Trellix ENS Endpoint Protection for Linux Standalone [File: McAfeeTP-10.7.16-27-Release-standalone.tar.gz]
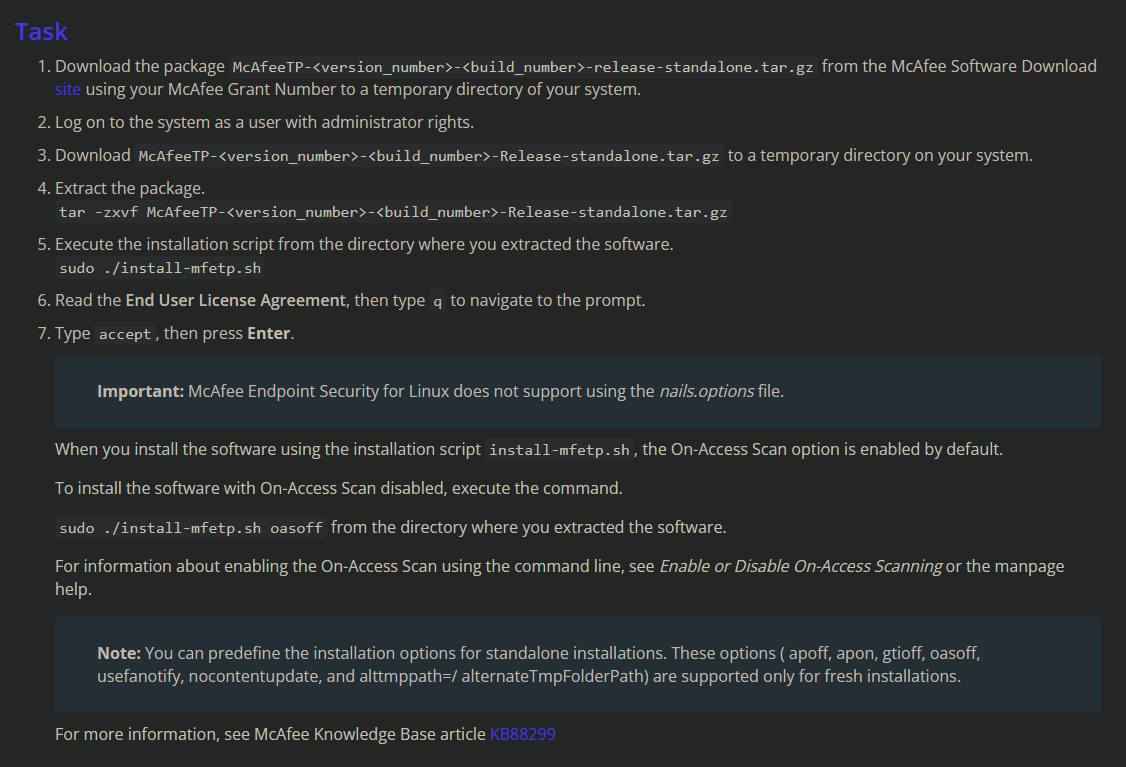
We can install the ENS Threat Protection. Copy over those files also with WINSCP

sudo ./install-mfetp.sh
Now we want to see if it works
Go to
/opt/McAfee/ens/tp/bin
List the pre defined Tasks:
./mfetpcli –listtask

Thats nice so we can now start a pre defined task.
As example a full scan.
./mfetpcli –runtask –index 2
Update DATA/MCORE
./mfetpcli –runtask –index 3
We had an error in standalone mode with some options:

I was unable to ENABLE the “Exploit Prevention” EP Module because the system i installed the solution is NOT Managed mc Mcafee EPO-Server. The reason may be that it get’s to risky in terms of false
And they only want it running in EPO Managed mode this way which makes sense. The EPO will push some default policy with Exlcusion and exceptions.

https://kcm.trellix.com/corporate/index?page=content&id=KB95920
|
Command line options: |
|
DESCRIPTION mfetpcli is the command-line tool to configure Endpoint Security for Linux. When operating in managed mode, configuration performed using this tool will be overwritten by ePO policy enforcement.
OPTIONS The following sub-commands and the respective options are described in this section. Sub-commands cannot be used together, e.g., –setoasglobalconfig and –setoasprofileconfig cannot be used at the same time. Wherever applicable, syntactical dependencies and restrictions have been highlighted for the sub-commands and the respective options.
Help options: –help Prints usage information of this tool.
Version Information: –version Prints the following information: Version of Endpoint Security for Linux. License information. Dat Version. Engine Version. Exploit Prevention Content Version. Copyright information.
Configure OAS global settings: –setoasglobalconfig This option lets you configure the global settings available in On-Access Scan policy.
Add Process option: –addprocess Adds processes to the list of user defined processes.
Set Process option: –setprocess Modifies the risktype of existing processes in the list of user defined processes.
Delete Process option: –delprocess Deletes a process from the process list.
Configures profile specific On-Access scanning options: –setoasprofileconfig Configures profile specific On-Access scanning options.
Setquarantine Folder option: –setquarantinefolder Specifies the folder where infected files will be quarantined.Default value is /Quarantine/. An absolute path should be specified as a value.
List Quarantine Items option: –listquarantineitems Lists the files that were quarantined.
Restore Quarantine Items option: –restorequarantineitems Restores the quarantine items to the original files on disk.
Get OAS configuration settings: –getoasconfig Prints details of On-Access Scan settings in standard output.
Get OAS profile configuration settings: –getoasprofileconfig Shows OAS settings applicable to the profile name specified.
Creates an On-Demand task (ODS): –addodstask Creates an On-Demand task (ODS)
Lists all the tasks configured on the system: –listtasks Lists all the tasks configured on the system, including the ones that are scheduled from ePO.
Deletes a task: –deltask Deletes a task based on the task index.
Runs a task: –runtask Runs a task based on the task index.
Stops a task: –stoptask Stops a task based on the task index.
Shows the task configuration: –showtask Shows the task configuration based on the task index.
Set Max product log size option: –setmaxproductlogsize This option configures the maximum product log file size.
Product Log option: –productlog This enables or disables product logging.
Debug Log option: –debuglog This enables or disables debug logging.
Use Syslog option: –usesyslog This enables or disables logging using syslog on the system.
On Access Scan Activity Log option: –oasactivitylog This enables or disables on-access scan activity logging on the system.
Use Fanotify option: –usefanotify This enables use of fanotify for On-Access Scan. |