Click on the Category button to get more articles regarding that product.
Here is how to make a complete new SMTP-connector on Port 26 and set it to Authenticate. So if the appliance/Software has to send an email you need an Active Directory account. You will not get this done with the GUI only in a regular Exchange 2007/2010. Small business version is different the STD or ENT.
1 Generate an Active Directory User called “smtp”. No further special membership. No Exchange Mailbox.
2 For testing Translate/Encode the username “domain\smtp” and password to BASE64
http://base64-encoder-online.waraxe.us/
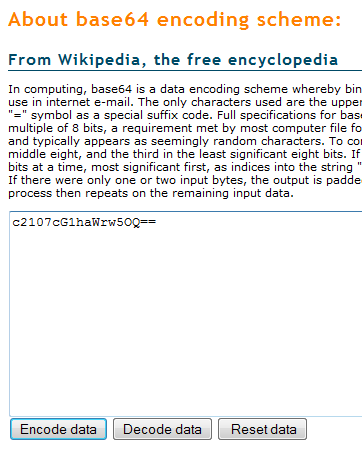
Both are sample values do not use!
YOURWINDOWSDOMAIN\smtp
TU9SQe4QlRcc210cA==
smtpasswordmysecrect
c210cG1h33aW44w5OQ==
3 Make a new Receive Connector and call it “RELAY”
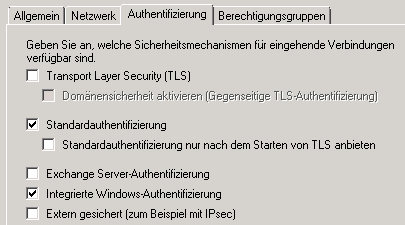
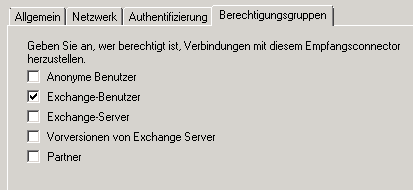
4 Change following GUI settings on the Connector
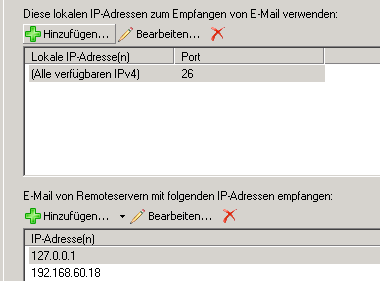
5 Change the Port from 25 to 26 and tell the Connector which IP are allowed to connect (Also mention your test server/Another than the exchange)
6 Do following Powershell to configure the Connector finally
Add-ADPermission “RELAY” –User “smtp” –ExtendedRights ms-Exch-SMTP-Accept-Authoritative-Domain-Sender
Add-ADPermission “RELAY” –User “smtp” –ExtendedRights ms-Exch-SMTP-Accept-Any-Sender
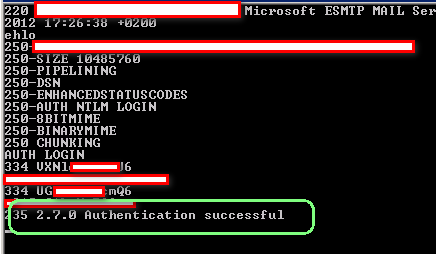
7 Test the relay
telnet myexchangeservername 26
ehlo
AUTH LOGIN
TU9SQe4QlRcc210cA== (Information from Step 2 BASE64 DOMAIN\username)
c210cG1h33aW44w5OQ== (Information from Step 2 BASE64 password)
In this moment you should GET a “235. 2.7.0 Authentication Successful”